Friday, October 26, 2012

Pool Noodle Birthday Party (sans the pool)

Alas, my poor son's birthday is in sweltering month of August and I am always looking for creative ways to keep the kids active and yet cool them off. So this year we tried an outdoor game theme with the main ingredients being pool noodles and water.

Thank goodness for the Dollar Tree! I was able to get the pool noodles, balloons, paper airplane kits, buckets and squishy balls there!

POOL NOODLES
First up, the Target Station. I got the idea to make this target from Parents.com. However, I decided to have the kids throw the pool squishy balls through the target instead of pool noodles.
     
Target Station
had so much fun creating the rings, that I next created a Ring Toss station.
Ring Toss
 Sponges in buckets of water made up the Splash Down game. The players take turns throwing their sponges into the bucket near the other player to try to soak them. The rules of the game can be found on Spoonful.
Splash Dow
 Use Your Noodles involved pool noodles with duct tape wrapped around the ends (think safe bat) and balloons. The noodle bats later became party favors. More details on this activity can be found at at Parents.com.
Use Your Noodle

I tried to make a Badminton net out of pool noodles. That did not fare so well, but the kids still had fun!
Badminton
The Paper Planes station included fun paper plane kits I found at the Dollar Tree.
Paper Airplanes
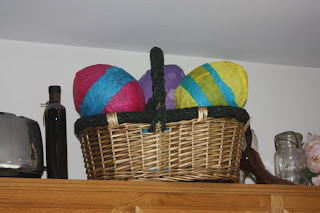
The balloon pinata was an absolutely brilliant idea and I am grateful to whomever first posted it on Pinterest. The original blog can be found here.
Pinata

Last, but not least, I had a bubble station for our younger guests. 
Bubbles
 By the end of the party, the kids had resorted to sitting in the kiddie pool, spraying each other with water guns, and dumping buckets of water over each others head (while the adults watched safely inside through the sliding glass door.)
Mayhem
PIRATE CAKE
I tried to make the pirate cake depicted on Spoonful, but my cake was not as pretty as theirs. However it did look quite impressive when the candles were lit!
Pirate Cake
Pirate Cake

Fire!

 It was a great birthday party over all!

Monday, August 27, 2012

Chocolate Birds Nest Cupcake Toppers

When looking for ideas for Catie's birthday party, I saw some adorable chocolate bird nests on a spoon made from dipping spoons in chocolate on the Cute Food for Kids site.I thought that these would be perfect cupcake toppers if I could make them without the plastic spoon.

1. Line cupcake molds with small pieces of parchment paper.
2. Place chocolate Candy Melts in a squirt bottle and set in warm water to melt.
3. Once melted, drizzle the chocolate into the bottom and sides of the cupcake molds.
4. Optional: sprinkle candy sprinkles over the top of the nests before adding the candy robin eggs.
5. Place in the refrigerator to harden the candy.
6. Once hardened, remove the nests from the molds and peel off the parchment paper.
7. Viola! a bird's nest cupcake topper!


Wednesday, July 11, 2012

Catie's Easter Birthday Party

Even though the bouncer I had reserved in February did not show up, I think my daughter's 4th birthday was a success.

Invitation wording:

Miss Catherine Grace is turning FOUR
For a theme she requested Hello Kitty-Princess-Lego-Star Wars.

However, as her birthday falls on Easter Day,
Instead we will have a bouncer and hunt for Easter eggs*!
The festivities will start at 11 am on April 8
And we hope that you can join us to celebrate

Decorations: Much to my husband's chagrin, there were Giant Easter Eggs everywhere: 

Cake table: featured coffee-filter flower bouquet, a Hello Kitty flower bouquet, and blow up light sabers.


Food: deviled eggs, crackers and cheese, fruit, a bread bunny dip bowl amid a field of veggies, a bunny shaped watermelon fruit bowl and finger sandwiches.
 Activities: make a princess crown or monster mask craft, an Easter egg hunt, and playing.

Birthday cupcakes: baked either in egg-shaped foils or ice cream cones and topped with chocolate birds nests, Hello Kitty candies, or candy Lego bricks (made with the Wilton's candy melts and a Lego brick ice cube tray).

Overall, I think the party was a success!


Catie seemed very happy with her party
.

Thursday, April 26, 2012

Coffee filter flower uses

In an earlier post, I detailed how I made coffee filter flowers. Here are some of the ways I have used these flowers:


1. Catie's Easter basket.....Dollar Tree bucket, coffee filter flowers, chicks from Michaels, a little ribbon and green tissue paper... and Beacon's 3-in1 glue.


2. Wreath: I absolutely love the way my wreath turned out and plan to use it each spring. My husband thought that I would be throwing out all of the decorations after Catie's party, but that will not be the case!


3. A table center piece: this arrangement practically made itself


4. Teacher Day gift bouquets:


Thursday, March 29, 2012

Gerber daisy, peony, and lilac paper flowers


Hyacinths, Gerber daisies, and peonies
I recently saw a post on Aunt Peaches blog on how to make hyacinths from tissue paper and another post where she made dyed coffee filters to make roses. I decided to make some for my daughter's Easter birthday party.

1. I diluted 15-20 drops of food dye McCormick's Neon food color and egg dye in approximately 0.25 - 0.5 cup water in a small bowl. The edges of groups of filters were placed in dye until they were completely wet. I was a little impatient for the filters to dry, so I put them on top of a piece of newspaper on a cookie sheet in the oven at 225 degrees, checking every 20 minutes.

Dying coffee filters-- note that the coffee filters acted like chromatography paper and separated out the pink and the blue of the purple neon dye
Do you see the flowers I saw in these filters?

2. After the filters were dried, fold 3-4 at a time into eighths and cut the tops into a heart shape or smaller petals. Cut a 3" wide (by approximately 18" long) strip of yellow tissue paper, fold it in half and notch the folded side. Cut this strip into 4 pieces (approximately equal in length).
Different flower petal shapes


3. Two techniques for making flower centers:
  • Aunt Peaches technique for making hyacinths to make the centers of the flowers:
Flower centers created with hyacinth technique
  • Twisted coffee filter: twist yellow filter into a loose ball and stem -- like a large lollipop.

4. Flower assembly: snip off the tip of the folded coffee filters, open them up, and attach them to the flower center with floral tape, floral wire or a pipe cleaner.

5. Fluff out the petals, experiment, and enjoy! I started out to make hyacinths and roses, but ended up with Gerber Daisies and Peonies!


Monday, March 26, 2012

How to make your own stencils for painting

A few years ago I was transitioning my son's room from Beatrix Potter to a jungle theme and decided it would be really cool to have glow in the dark animal shapes painted on the ceiling.I looked high and low for animal stencils and stamps that were more than 3-4 inches wide, but could not find anything, so I decided to make my own out of contact paper.

Step 1. Cut out shape for your stencil. I found some animal graphics on the web that I enlarged.


Step 2. Trace the shape with a Sharpie onto a piece of clear contact paper.

Step 3. Carefully cute out the center of the shape, leaving the outside piece of contact paper in tact.

Step 4. Here is the cool part, peel off the back of the contact paper and place it on the ceiling where you want the stencil to be. I found that the contact paper adheres to the ceiling perfectly and keeps the paint for bleeding under the edges (even better than the painters tape), so your shape stays really sharp....even when you are painting the shapes on the ceiling.

Step 5. Paint the shape....I used glow in the dark paint, but this would work with any paint.

Step 6. After the paint dries, simply peel off the contact paper and throw it away.
The glow-in-the- dark paint doesn't show up so well here, but it looks really cool at night!

7. As an added bonus, you can use the inner cut out of the contact paper for another project.

Monday, March 19, 2012

Paper Mache Easter Eggs

I came across an adorable post on the Not Martha blog detailing how to make paper mache eggs using liquid starch, water balloons and tissue paper. I thought this was a wonderful project to make for my daughter's birthday which falls on Easter this year. Since Not Martha did such a wonderful job detailing how to make these eggs in her original post, I will only highlight the variations I tried.


Close up of the bunny punch out eggs that I made on my improvised drying rack (hangers and clothes pins).

1. The dots on the eggs Not Martha's eggs were absolutely adorable. However, since I was making 50+ eggs for Catie's party and class gifts,  I quickly got tired of trying to put little bunny punch outs on the eggs and moved on to stripes.

Eggs decorated with strips of colored tissue paper.

2. I next replaced the tissue paper with streamers in this process. The streamer eggs seemed more flexible than the tissue paper ones, but then again there was also 1 layer instead of 3-4.

Yellow/red egg made from streamers.

3. Since I wanted to stuff the eggs with larger items (toy cars, etc.), I found that cutting a cross in the tops worked better for filling the eggs that cutting in two places only.

Cross shape cut in top of egg.

4. I used gift wrap curling ribbon instead of string as a brighter way to attached the 'pull me' note.

A bowl full of eggs.

5. I filled a few of the eggs with lollipops and left the sticks sticking out to make them look like balloons. I was not completely happy with the result, but have posted a picture here in case it is something someone else might want to try.
Lollipop egg.

6. Finally, I thought the eggs turned out so well that I made some out of normal-sized balloons to use as decorations. The striped eggs were created by wrapping strips of colored tissue paper around the eggs. The polka dot eggs were made by using a tissue paper that already had that design on it.

Large eggs for party decorations.
Good luck and I hope that you have as much fun making these eggs as I did!